HACKER ANGELWHITE GALC

domingo, 29 de abril de 2018

Conoce nuestra herramienta de hacking web WebHackSHL

SecHackLabs 
WebHackSHL es una herramienta de código abierto para el análisis de vulnerabilidades y recopilación de información de sitios web y servidores. Esta se basa en la recolección de scripts en python2, ruby , perl y otras herramientas conocidas (como son sqlmap, nmap, nikto, whatweb, etc.), con el propósito general de hacer accesibles las opciones de estas poderosas herramientas a usuarios que no tengan mucha experiencia en el manejo de las mismas. 

WebHackSHL contiene scripts propios, creados por el equipo de Security Hack Labs, junto a otros scripts y programas que tienen las mejores calificaciones y resultados en cada área. La herramienta esta disponible para descarga aquí y se distribuye bajo la licencia GPLv3.

WebHackSHL esta diseñada para operar correctamente en sistemas GNU/Linux Debian o GNU/Linux  ArchLinux y basados en los mismos. WebHackSHL esta en idioma español, lo que facilita el uso de dicha herramienta y actualmente cuenta con 6 apartados en los cuales ofrece diferentes opciones. También existe una version de la herramienta para Android, puedes leer este artículo.
Ayuda:

~$ python2 webhackshl.py -h
Actualizar la herramienta:
~$ python2 webhackshl.py -u 
Uso general:
~$ python2 webhackshl.py
 
WebHack


1) Buscar URLs vulnerables a SQLi, LFI, RCE, XSS. Para realizar esta función, WebHackSHL hace uso de una de las herramientas diseñadas por nosotros llamada sqlitest. Lo que hace básicamente este script es tomar los parámetros que el usuario le pase por la linea de comandos entre los cuales están: Un dominio, un dork y un tipo de test que desee hacer. Aquí una demostración sobre como funciona esta opción.


2) Realizar SQLi a una web vulnerable. Con la opción anterior podemos obtener sitios webs vulnerables a este tipo de ataque, así que vamos a usar uno de los sitios vulnerables que recopilamos anteriormente para hacer una pequeña prueba (Aquí realice la inyección antes para no extender el vídeo, pero todo funciona correctamente).


3) Realizar un escaneo completo a un host, enumerar DNS, Bypassear Cloudflare y más. En este apartado nos encargamos de recolectar la mayor cantidad de información posible sobre nuestro objetivo, usando herramientas como nmap y whatweb.


4) Realizar pruebas de penetración web y análisis de vulnerabilidades. Esta opción nos brinda la oportunidad de realizar el escaneo directo hacia un tipo de CMS especifico, en este caso Joomla o WordPress. Más adelante añadiremos soporte a otros CMS.

5) Buscar el panel admin de un sitio web. Ya luego de haber obtenido las credenciales usando los métodos anteriores, el siguiente paso es encontrar en donde loguearnos dentro de dicha web, para ello esta esta opción que usa uno de nuestros scripts para realizar el escaneo.


6) Ataques a contraseñas y hashing. La finalidad de esta opción es realizar la identificación de tipos de hash y ayudar a la desencriptación mostrando enlaces hacia uno de los mejores sitios como es hashkiller. Adicionalmente existe un link donde hemos recopilado los mejores diccionarios para ataques de bruteforce, que serán implementados próximamente en WebHackSHL.

7) Realizar inyección Server Side template Injection (SSTI) a un sitio web vulnerable. Esta opción sirve para explotar los servidores vulnerables a SSTI, puedes leer este artículo para informarte.

Cabe aclarar que las demostraciones hechas en este tutorial fueron las mas sencillas y solo fue para hacer la presentación de esta herramienta, WebHackSHL contiene muchísimas mas opciones que podrás usar libremente. La herramienta solo esta hecha con fines educativos, cualquier daño realizado con la misma es responsabilidad del usuario.

Síguenos en FacebookTwitterunete a nuestra charla en Riotúnete a IRC o únete a Telegram y no olvides compartirnos en las redes sociales. También puede hacernos una donación o comprar nuestros servicios.

viernes, 23 de marzo de 2018

txtool/web pentesting tool


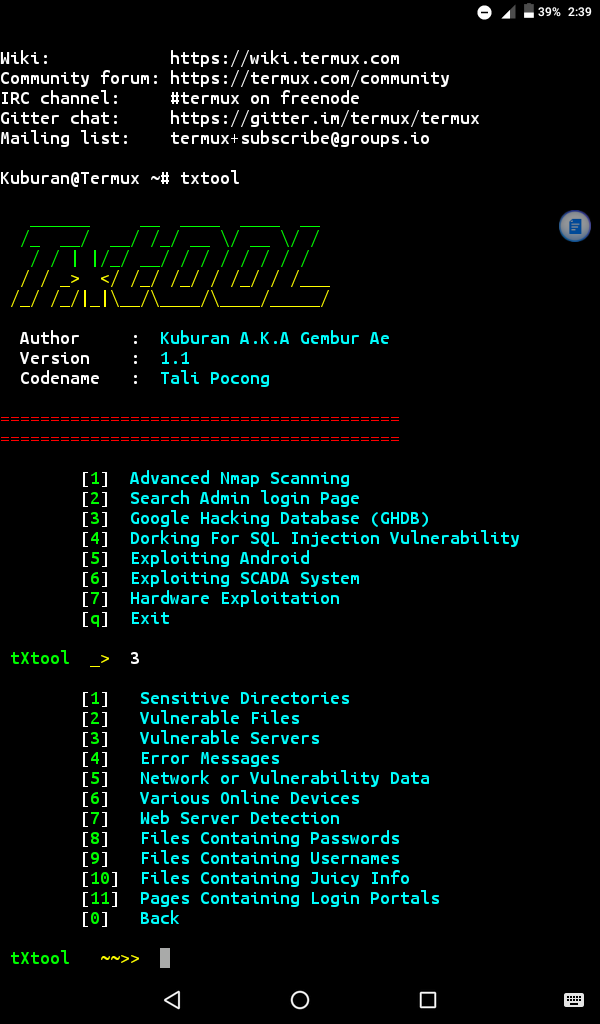
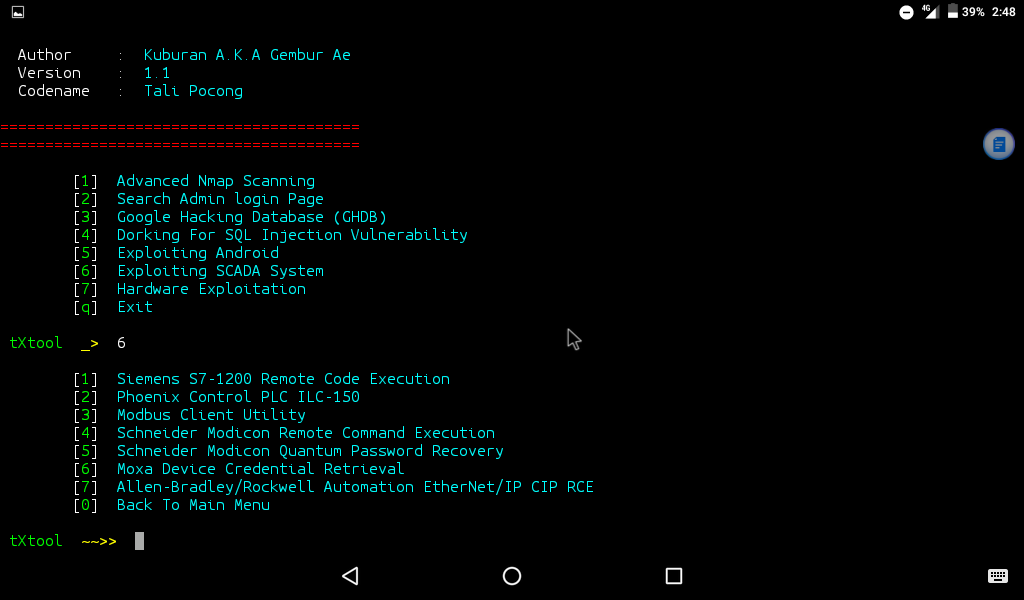
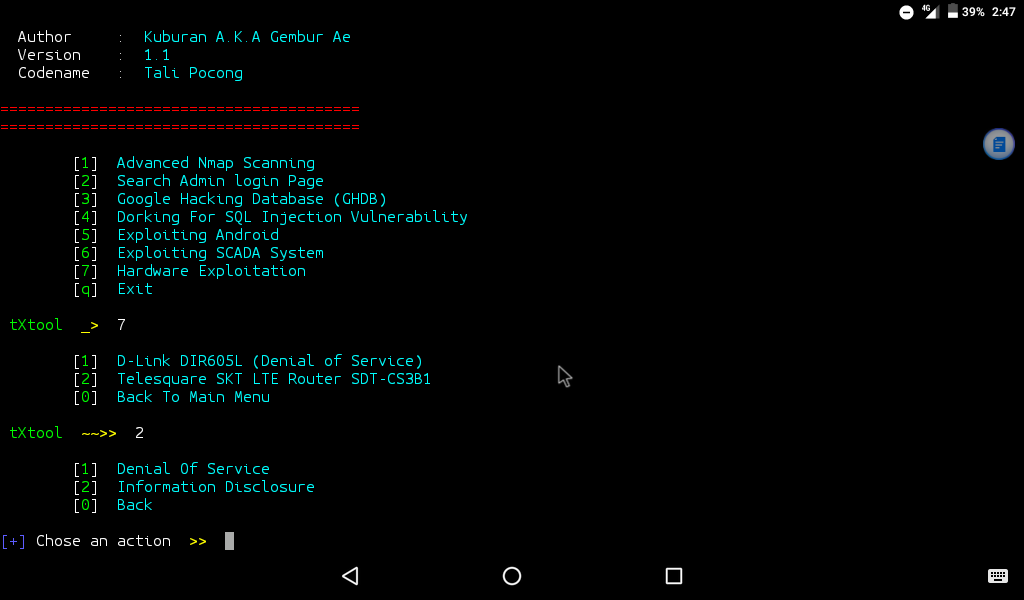
txtool is made to help you for easly pentesting in termux,
build on termux and only available for termux.

installation steps

$ git clone https://github.com/kuburan/txtool.git
$ cd txtool
$ apt install python2
$ ./install.py
Done. type txtool to launch this tool.

Screenshot


 Screenshot


Screenshot 


lunes, 19 de marzo de 2018

alt tag

ABOUT:

Sn1per is an automated scanner that can be used during a penetration test to enumerate and scan for vulnerabilities.

DEMO VIDEO:

Demo

FEATURES:

  • Automatically collects basic recon (ie. whois, ping, DNS, etc.)
  • Automatically launches Google hacking queries against a target domain
  • Automatically enumerates open ports via NMap port scanning
  • Automatically brute forces sub-domains, gathers DNS info and checks for zone transfers
  • Automatically checks for sub-domain hijacking
  • Automatically runs targeted NMap scripts against open ports
  • Automatically runs targeted Metasploit scan and exploit modules
  • Automatically scans all web applications for common vulnerabilities
  • Automatically brute forces ALL open services
  • Automatically test for anonymous FTP access
  • Automatically runs WPScan, Arachni and Nikto for all web services
  • Automatically enumerates NFS shares
  • Automatically test for anonymous LDAP access
  • Automatically enumerate SSL/TLS ciphers, protocols and vulnerabilities
  • Automatically enumerate SNMP community strings, services and users
  • Automatically list SMB users and shares, check for NULL sessions and exploit MS08-067
  • Automatically exploit vulnerable JBoss, Java RMI and Tomcat servers
  • Automatically tests for open X11 servers
  • Auto-pwn added for Metasploitable, ShellShock, MS08-067, Default Tomcat Creds
  • Performs high level enumeration of multiple hosts and subnets
  • Automatically integrates with Metasploit Pro, MSFConsole and Zenmap for reporting
  • Automatically gathers screenshots of all web sites
  • Create individual workspaces to store all scan output

KALI LINUX INSTALL:

./install.sh

DOCKER INSTALL:

Credits: @menzow
Docker Install: https://github.com/menzow/sn1per-docker
Docker Build: https://hub.docker.com/r/menzo/sn1per-docker/builds/bqez3h7hwfun4odgd2axvn4/
Example usage:
$ docker pull menzo/sn1per-docker
$ docker run --rm -ti menzo/sn1per-docker sniper menzo.io

USAGE:

[*] NORMAL MODE
sniper -t|--target <TARGET>

[*] NORMAL MODE + OSINT + RECON
sniper -t|--target <TARGET> -o|--osint -re|--recon

[*] STEALTH MODE + OSINT + RECON
sniper -t|--target <TARGET> -m|--mode stealth -o|--osint -re|--recon

[*] DISCOVER MODE
sniper -t|--target <CIDR> -m|--mode discover -w|--workspace <WORSPACE_ALIAS>

[*] SCAN ONLY SPECIFIC PORT
sniper -t|--target <TARGET> -m port -p|--port <portnum>

[*] FULLPORTONLY SCAN MODE
sniper -t|--target <TARGET> -fp|--fullportonly

[*] PORT SCAN MODE
sniper -t|--target <TARGET> -m|--mode port -p|--port <PORT_NUM>

[*] WEB MODE - PORT 80 + 443 ONLY!
sniper -t|--target <TARGET> -m|--mode web

[*] HTTP WEB PORT MODE
sniper -t|--target <TARGET> -m|--mode webporthttp -p|--port <port>

[*] HTTPS WEB PORT MODE
sniper -t|--target <TARGET> -m|--mode webporthttps -p|--port <port>

[*] ENABLE BRUTEFORCE
sniper -t|--target <TARGET> -b|--bruteforce

[*] AIRSTRIKE MODE
sniper -f|--file /full/path/to/targets.txt -m|--mode airstrike

[*] NUKE MODE WITH TARGET LIST, BRUTEFORCE ENABLED, FULLPORTSCAN ENABLED, OSINT ENABLED, RECON ENABLED, WORKSPACE & LOOT ENABLED
sniper -f--file /full/path/to/targets.txt -m|--mode nuke -w|--workspace <WORKSPACE_ALIAS>

[*] ENABLE LOOT IMPORTING INTO METASPLOIT
sniper -t|--target <TARGET>

[*] LOOT REIMPORT FUNCTION
sniper -w <WORKSPACE_ALIAS> --reimport

[*] UPDATE SNIPER
sniper -u|--update 
 

MODES:

  • NORMAL: Performs basic scan of targets and open ports using both active and passive checks for optimal performance.
  • STEALTH: Quickly enumerate single targets using mostly non-intrusive scans to avoid WAF/IPS blocking.
  • AIRSTRIKE: Quickly enumerates open ports/services on multiple hosts and performs basic fingerprinting. To use, specify the full location of the file which contains all hosts, IPs that need to be scanned and run ./sn1per /full/path/to/targets.txt airstrike to begin scanning.
  • NUKE: Launch full audit of multiple hosts specified in text file of choice. Usage example: ./sniper /pentest/loot/targets.txt nuke.
  • DISCOVER: Parses all hosts on a subnet/CIDR (ie. 192.168.0.0/16) and initiates a sniper scan against each host. Useful for internal network scans.
  • PORT: Scans a specific port for vulnerabilities. Reporting is not currently available in this mode.
  • FULLPORTONLY: Performs a full detailed port scan and saves results to XML.
  • WEB: Adds full automatic web application scans to the results (port 80/tcp & 443/tcp only). Ideal for web applications but may increase scan time significantly.
  • WEBPORTHTTP: Launches a full HTTP web application scan against a specific host and port.
  • WEBPORTHTTPS: Launches a full HTTPS web application scan against a specific host and port.
  • UPDATE: Checks for updates and upgrades all components used by sniper.
  • REIMPORT: Reimport all workspace files into Metasploit and reproduce all reports.

SAMPLE REPORT:

https://gist.github.com/1N3/8214ec2da2c91691bcbc

LICENSE:

This software is free to distribute, modify and use with the condition that credit is provided to the creator (1N3@CrowdShield) and is not for commercial use.

LOGO:

Credit to Sponge Nutter for the original sniper penguin logo.

DONATIONS:

Donations are welcome. This will help fascilitate improved features, frequent updates and better overall support for sniper.
  • BTC 1Fav36btfmdrYpCAR65XjKHhxuJJwFyKum
  • ETH 0x20bB09273702eaBDFbEE9809473Fd04b969a794d
  • LTC LQ6mPewec3xeLBYMdRP4yzeta6b9urqs2f
  • XMR 4JUdGzvrMFDWrUUwY3toJATSeNwjn54LkCnKBPRzDuhzi5vSepHfUckJNxRL2gjkNrSqtCoRUrEDAgRwsQvVCjZbS3EN24xprAQ1Z5Sy5s
  • ZCASH t1fsizsk2cqqJAjRoUmXJSyoVa9utYucXt7


StaCoAn: herramienta Crossplatform que ayuda a desarrolladores, cazadores de errores y hackers éticos a realizar análisis de código estático en aplicaciones móviles


StaCoAn header


StaCoAn Issues badge License badge status Travis

StaCoAn is a crossplatform tool which aids developers, bugbounty hunters and ethical hackers performing static code analysis on mobile applications*.
This tool will look for interesting lines in the code which can contain:
  • Hardcoded credentials
  • API keys
  • URL's of API's
  • Decryption keys
  • Major coding mistakes
This tool was created with a big focus on usability and graphical guidance in the user interface.

For the impatient ones, grab the download on the releases page.
*: note that currently only apk files are supported, but ipa files will follow very shortly.

An example report can be found here: example report

Table of Contents

Features

The concept is that you drag and drop your mobile application file (an .apk or .ipa file) on the StaCoAn application and it will generate a visual and portable report for you. You can tweak the settings and wordlists to get a customized experience.
The reports contain a handy tree viewer so you can easily browse trough your decompiled application.


Mockup  application

Looting concept

The Loot Function let you 'loot' (~bookmark) the findings which are of value for you and on the loot-page you will get an overview of your 'loot' raid.
The final report can be exported to a zip file and shared with other people.

Wordlists

The application uses wordlists for finding interesting lines in the code. Wordlists are in the following format:
API_KEY|||80||| This contains an API key reference
(https|http):\/\/.*api.*|||60||| This regex matches any URL containing 'api'
 
 
Note that these wordlists support regex entries.

In the exclusion_list.txt you can define exclusions (if you have for some reason to much findings):
(https|http):\/\/.*api.*|||"res","layout"||| Like previously, note that "res","layout" resembles the path
(https|http):\/\/.*api.*|||||| To exclude everywhere

Filetypes

Any source file will be processed. This contains '.java', '.js', '.html', '.xml',... files.
Database-files are also searched for keywords. The database also has a table viewer.

database

Responsive Design

The reports are made to fit on all screens.

Limitations

This tool will have trouble with obfuscated code. If you are a developer try to compile without obfuscation turned on before running this tool. If you are on the offensive side, good luck bro.

Getting Started

From the releases

If you want to get started as soon as possible, head over to the releases page and download the executable or archive which corresponds to your operating system.
If you have downloaded the release zip file, extract this.
On Windows you can just double click the executable. It will open in server mode and you can just drag and drop your mobile applications in the webinterface.
Windows 1 click


On Mac and Linux you can just run it from the terminal without arguments for the server-mode.
./stacoan
 
Drag and drop this file onto the executable.
Or you can specify an apk-file to run it without the server-mode:
./stacoan -p test-apk.apk
 
The report will be put inside a folder with a name corresponding to the apk.

Docker

cd docker
docker build . -t stacoan
Make sure that your application is at the location /yourappsfolder.
docker run -e JAVA_OPTS="-Xms2048m -Xmx2048m" -p 8000:8000 -p 8080:8080 -i -t stacoan
Drag and drop your application via: http://127.0.0.1:8000.

From source

git clone https://github.com/vincentcox/StaCoAn/
cd StaCoAn/src
Make sure that you have pip3 installed:
sudo apt-get install python3-pip
Install the required python packages:
pip3 install -r requirements.txt
Run StaCoAn:
python3 stacoan.py -p yourApp.apk
Or if you rather use the drag and drop interface:
python3 stacoan.py -p yourApp.apk --disable-browser --enable-server

Building the executable

Make sure that you are in the src folder.
cd src
Install PyInstaller:
pip3 install pyinstaller

Windows

PyInstaller can't handle subfolders with code, therefore we need to put the code in one folder.
sed -i 's/from helpers./from /g' helpers/*
sed -i 's/from helpers./from /g' stacoan.py
sed -i 's/os.path.join(parentdir, "config.ini")/"config.ini"/g' helpers/logger.py
cp helpers/* ./ || :;
Build stacoan:
python3 -m PyInstaller stacoan.py --onefile --icon icon.ico --name stacoan --clean

mac

PyInstaller can't handle subfolders with code, therefore we need to put the code in one folder.
# Note the ''-> this is because sed syntax is different on mac.
sed -i '' 's/from helpers./from /g' helpers/*
sed -i '' 's/from helpers./from /g' stacoan.py
sed -i '' 's/os.path.join(parentdir, "config.ini")/"config.ini"/g' helpers/logger.py
cp helpers/* ./ || :;
Build stacoan:
python3 -m PyInstaller stacoan.py --onefile --icon icon.ico --name stacoan --clean

Linux

PyInstaller can't handle subfolders with code, therefore we need to put the code in one folder.
sed -i 's/from helpers./from /g' helpers/*
sed -i 's/from helpers./from /g' stacoan.py
sed -i 's/os.path.join(parentdir, "config.ini")/"config.ini"/g' helpers/logger.py
cp helpers/* ./ || :;
Build stacoan:
python3 -m PyInstaller stacoan.py --onefile --icon icon.ico --name stacoan --clean

Contributing

This entire program's value is depending on the wordlists it is using. In the end, the final result is what matters. It is easy to build a wordlist (in comparison to writing actual code), but it has the biggest impact on the end result. You can help the community the most with making wordlists.
If you want an easy way to post your idea's, head over to: http://www.tricider.com/brainstorming/2pdrT7ONVrB. From there you can add ideas for entries in the wordlist.
Improving the code is also much appreciated.
If the contribution is high enough, you will be mentioned in the authors section.

Roadmap

  • Make IPA files also work with this program
  • Make DB matches loot-able
  • Better logging (cross platform)
  • Docker optimalisation
  • Use server to upload files (apk's, ipa's) and process them
  • Exception list for ignoring findings in certain folders. For example ignoring http in res/layout and in general http://schemas.android.com/apk/res/android
  • Make a cleaner file structure of this project

LInk para Descargar:  https://github.com/vincentcox/StaCoAn


Th3inspector - herramienta para la recogida de información

https://camo.githubusercontent.com/0fcfae204f3d8634eae5c6d5f9b7cc98652bd786/68747470733a2f2f692e696d6775722e636f6d2f3633545342694d2e706e67


 https://camo.githubusercontent.com/ee97e283aee9901e9f4695c0c1390bcca9f8f12e/68747470733a2f2f692e696d6775722e636f6d2f513831594a43552e706e67


Th3inspector es una herramienta para la recopilacion de informacion.


Información del sitio
[+] información del número de teléfono
[+] encontrar dirección ip y servidor de correo electrónico
[+] búsqueda de dominios
[+] encuentre la ubicación del sitio web / IP
[+] Bypass Cloudflare
[+] Verificador de la edad de dominio
[+] Agente de usuario info
[+] comprobar los servicios activos en los recursos
[+] Tarjeta de crédito
[+] Escáner subdominio
[+] Verificador de direcciones de correo electrónico
[+] Verificador del sistema de gestión del contenido
Link(){
https://github.com/Moham3dRiahi/Th3inspector
}


Veamos en siguiente video   como es que el trabaja


Pasos para  manejo

  • To list all the basic options and switches use -h switch:
perl Th3inspector.pl -h
  • To Get Website Information:
perl Th3inspector.pl -i example.com
  • To Get Phone Number Information :
perl Th3inspector.pl -n xxxxxxx
  • To Find IP Address And E-mail Server:
perl Th3inspector.pl -mx example.com
  • To Find Website Or IP Address Location :
perl Th3inspector.pl -l example.com
  • To Get Real IP Of Website Using CloudFlare Protection
perl Th3inspector.pl -c example.com


pasos para instalacion 


nstallation Linux alt tag

git clone https://github.com/Moham3dRiahi/Th3inspector.git
cd Th3inspector
chmod +x install.sh && ./install.sh

Installation Android alt tag

Download Termux
git clone https://github.com/Moham3dRiahi/Th3inspector.git
cd Th3inspector
chmod +x install.sh && ./install.sh

Installation Windows alt tag

Download Perl
Download Th3inspector
cpan install JSON
Extract Th3inspector into Desktop
Open CMD and type the following commands:
cd Desktop/Th3inspector-master/
perl Th3inspector.pl


viernes, 2 de febrero de 2018

Fsociety Hacking Tools Pack: Un Framework de Pentesting

Fsociety


Aquellos lectores que en algún momento se pudieron tomar el tiempo de ver  la serie de Mr. Robot, el nombre de este pack les serán muy familiar, pero para aquellos que aún no han visto esta estupenda serie, no saben de qué estamos hablando.Les explicare un poco Mr. Robot es una serie donde el personaje principal es un hacker joven, que sin embargo tiene que recurrir a algunos medicamentos y al parecer tiene pérdida de memoria constante, la serie se centraliza en que el grupo de hackers planea derrotar una mega compañía que tiene el control de varios rubros a nivel mundial y entre ellos las finanzas.

El personaje principal se une a un grupo de hackers que planean derrocar a esta compañía, lo interesante de la serie es que pretende a ser un poco más realista y no solo mostrarnos a un montón de personas tecleando a lo bestia para realizar sus labores de hacking.
Sin más pues te puedo recomendar la serie y te tomes tu tiempo para entender y disfrutarla. Pasando al tema principal, Fsociety Hacking Tools, es una serie de herramientas reunidas en un solo lugar para poder trabajar en conjunto.
Mr robot

¿Qué es Fsociety Hacking Tools Pack?

Fsociety Hacking Tools nos provee de varias herramientas destinadas para diferentes usos, entre los que encontramos:
  • Recopilación de información
  • Ataques de contraseñas
  • Pruebas inalámbricas
  • Herramientas de explotación
  • Sniffing y Spoofing
  • Piratería web
  • Piratería web privada
  • Explotación posterior
Dentro de los cuales podemos encontrar las siguientes herramientas para realizar pruebas de penetración a redes inalámbricas, explotar vulnerabilidades, entre otras:
Information Gathering :
  • Nmap
  • Setoolkit
Port Scanning

  • Host To IP
  • wordpress user
  • CMS scanner
  • XSStracer
  • Dork – Google Dorks Passive Vulnerability Auditor
  • Scan A server’s Users
 Password Attacks :
  • Cupp
  • Ncrack
 Wireless Testing :
  • reaver
  • pixiewps
Exploitation Tools:
  • Venom
  • sqlmap
  • Shellnoob
  • commix
  • FTP Auto Bypass
  • jboss-autopwn
Sniffing & Spoofing :
  • Setoolkit
  • SSLtrip
  • pyPISHER
  • SMTP Mailer
Web Hacking :
  • Drupal Hacking
  • Inurlbr
  • Wordpress & Joomla Scanner
  • Gravity Form Scanner
  • File Upload Checker
  • Wordpress Exploit Scanner
  • Wordpress Plugins Scanner
  • Shell and Directory Finder
  • Joomla! 1.5 – 3.4.5 remote code execution
  • Vbulletin 5.X remote code execution
  • BruteX – Automatically brute force all services running on a target
  • Arachni – Web Application Security Scanner Framework
 Private Web Hacking
  • Get all websites
  • Get joomla websites
  • Get wordpress websites
  • Control Panel Finder
  • Zip Files Finder
  • Upload File Finder
  • Get server users
  • SQli Scanner
  • Ports Scan (range of ports)
  • ports Scan (common ports)
Get server Info
  • Bypass Cloudflare
  • Post Exploitation
  • Shell Checker
  • POET
  • Phishing Framework
Hacking pack


¿Cómo instalar Fsociety Hacking Tools Pack?

Antes que todo se deben  considerar las dependencias necesarias para que puedas instalar con éxito este pack, primero debes contar con el soporte para clonar los repositorios de git y también contar con Python instalado en tu sistema.
Este pack puede ser instalado en cualquier distribución de Linux, ya que su creador nos proporciona su medio de instalación directamente desde su git. Para poder obtener este pack necesitamos abrir una terminal y ejecutar lo siguiente:
git clone https://github.com/Manisso/fsociety.git
Con este nos descargara los archivos del git, hecho este proceso procedemos a ingresar a la carpeta descargada y ejecutar lo siguiente:
cd fsociety && python fsociety.py
Estando dentro tecleamos la 0 que es la opción, 0: INSTALL & UPDATE
Con ello se comenzaran a instalar todas las herramientas para poderlas utilizar.

¿Cómo ejecutar fsociety?

Al terminal la labor de la instalación solo debemos ejecutar sobre la terminal el siguiente comando para que se nos abra el menú con la lista de herramientas:
1
fsociety
Cabe destacar que este pack no solo esta limitado a Linux, también podemos ejecutar este pack de herramientas sobre Android o cualquier otro sistema, solo debemos buscar alguna aplicación que nos ayude a emular la terminal de Linux, para el caso de Android, en el git del pack nos recomiendan Termux, en Windows podemos usarCygwin
Sin mas el uso de este pack es completamente responsabilidad de quienes decidan instalarlo, tutoriales sobre las herramientas hay muchos en la red, el uso de esto debe ser con la autorización y consentimiento de las personas y sobre todo evitar problemas legales, sin mas eso todo.


miércoles, 24 de enero de 2018

burp_wp: WPScan like plugin for Burp Suite


Burp WP
Find known vulnerabilities in WordPress plugins and themes using Burp Suite proxy.
Usage
Install extension. Browse WordPress sites through Burp proxy. Vulnerable plugins and themes will appear in the issue list.
Usage

If you have Burp Pro, issues will also appear inside Scanner tab. Interesting things will be highlighted.
Usage pro
Installation
  1. Download Jython standalone JAR, for example, version 2.7
  2. Go to Extender->Options. Set path inside Location of Jython standalone JAR file
Install Jython
  1. Download newest Burp WP
  2. Go to Extender->Extensions. Click Add. Set Extension type to Python. Set path inside Extension file.
Install Burp WP
  1. Burp WP should appear inside Burp Extensions list. Also you will see new tab.
Installed extension

Intruder payload generator

Because proxy requests and responses are used it’s not possible to discover all plugins and themes installed on a specific website.
You can try to get more information manually using intruder payload generator.
Right click on URL inside Proxy->HTTP history and choose Send to Burp WP IntruderSend to intruder
This will replace request method to GET, remove all parameters and set payload position marker.
Now go to Intruder->Tab X->Positions. Correct URL so it points to WordPress homepage.
Intruder positions
Inside Payloads tab uncheck Payload encoding so / won’t be converted to %2f.
Then set Payload type to Extension generated. Now click Select generator:
Intruder choose payload
There are 3 generators:
  1. WordPress Plugins
  2. WordPress Themes
  3. WordPress Plugins and themes
Intruder attack
Copyright (c) 2018 Kacper Szurek